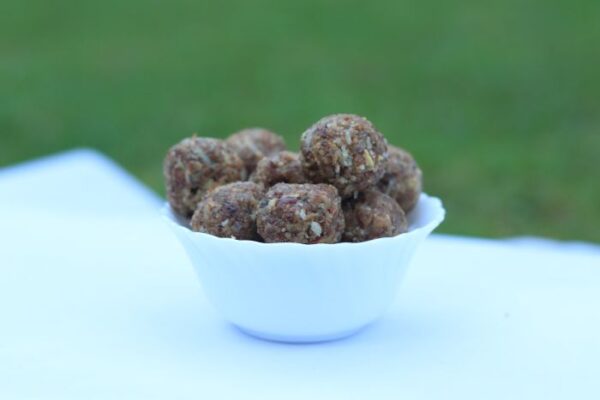
Fatty Liver-Friendly Christmas Menu: Festive Recipes for a Healthy Liver

The winter holidays are just around the corner, and if you’re managing a fatty liver, you might feel like you’re in for a season of “no, thanks” at every family dinner.

I know how it feels – being a foodie but having to say “no” to all the things that make holidays feel like, well, holidays. So today I am here to show you that your Santa doesn’t have to always say “No, no, no” instead of “Ho, Ho Ho”.

You can still enjoy festive, delicious dishes without compromising your health. On the contrary – these foods re liver friendly and the entire family will love them, not just those diagnosed with NAFLD/MASLD.

Trying to make things as festive as possible and break away from the regular diet is useful in keeping you on track (at least when it comes to your sanity).

But enough intros – you’re here for the recipes! Let’s make this Christmas delicious and healthy! (And remember to follow the notes I add – they’ll help keep these recipes as fatty liver-friendly as possible!)

Christmas Appetizers for NAFLD

Let’s kick things off with appetizers! These are easy starters that can be modified to keep the fat and carbs low and flavors high.

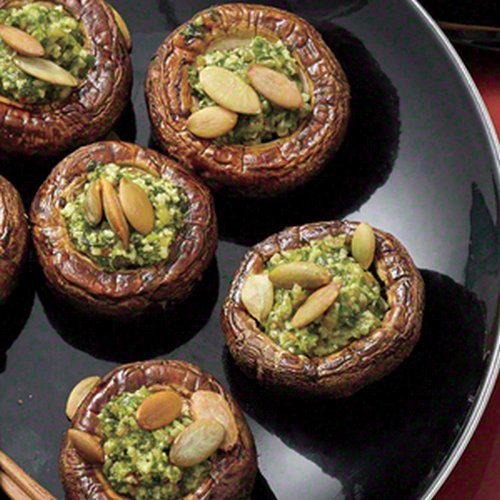
Pepita Pesto-Stuffed Mushrooms

stuffed mushrooms for fatty liver

Ingredients:

  • 12-15 large button or cremini mushrooms, stems removed
  • 1/2 cup raw pepitas (pumpkin seeds)
  • 1 cup fresh parsley leaves
  • 1/4 cup fresh basil leaves
  • 1 small garlic clove, minced
  • 1-2 tbsp nutritional yeast (for a cheesy flavor without actual cheese; optional)
  • 1 tbsp fresh lemon juice
  • 1-2 tbsp water, to thin as needed
  • Salt and pepper to taste

Instructions:

  1. Preheat your oven to 375°F (190°C). Line a baking sheet with parchment paper.
  2. Clean the mushrooms by gently wiping them with a damp cloth. Carefully remove the stems, creating a hollow space for the filling.
  3. In a food processor, combine the pepitas, parsley, basil, garlic, nutritional yeast (if using), and lemon juice. Pulse until well combined and finely chopped. Add a tablespoon of water if the mixture is too thick; it should be spreadable but not runny. Season with salt and pepper to taste.
  4. Spoon a small amount of the pepita pesto into each mushroom cap, pressing it gently to fill the cavity.
  5. Arrange the stuffed mushrooms on the prepared baking sheet. Bake in the preheated oven for 15-20 minutes, or until the mushrooms are tender and the filling is slightly golden.
  6. Garnish with a sprinkle of fresh parsley for a pop of color and serve warm. These mushrooms are best enjoyed fresh out of the oven.

Optional Variation: For a bit of extra zest, add a dash of chili flakes to the pesto mixture for a mild kick!

Spinach & Brie-Topped Artichoke Hearts
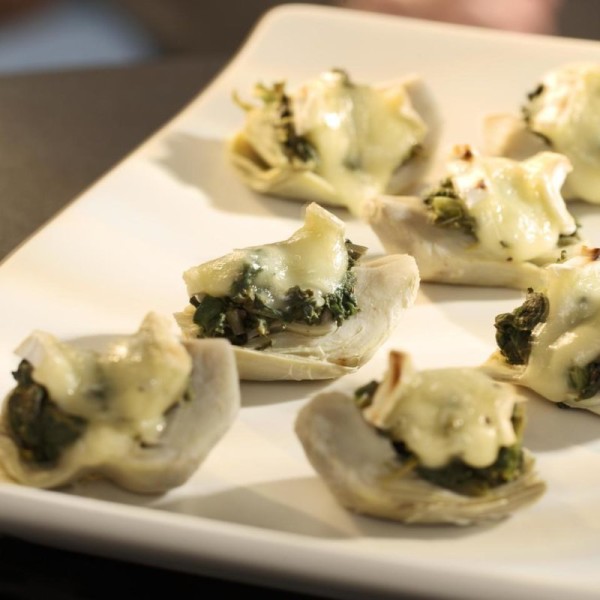
stuffed artichoke with spinach and brie

Note – the ingredients below are for 12 portions. You can adjust as needed

Ingredients:

  • 12 whole artichokes or 12 large canned or frozen artichoke hearts (if using canned/frozen, drain and pat dry)
  • 1 1/4 cups fresh spinach, cooked and chopped (or use frozen spinach, thawed and squeezed dry)
  • 1 teaspoon lemon zest (for a fresh burst of flavor)
  • 1/2 teaspoon lemon pepper
  • 1/4 teaspoon salt (adjust to taste)
  • 12 thin slices of brie cheese (about the size of the artichoke heart)

Instructions:

  1. If using whole fresh artichokes, trim the tops and remove tough outer leaves. Boil them for 15-20 minutes until tender. Cut each artichoke in half and scoop out the fuzzy choke to create a cavity for the stuffing. If using canned or frozen artichoke hearts, follow package directions, then drain and pat dry.
  2. Set your oven’s broiler on high.
  3. In a bowl, combine the cooked spinach, lemon zest, lemon pepper, and salt. Mix well, adjusting seasoning to taste.
  4. Arrange the artichokes on a baking sheet lined with parchment paper. Spoon a small amount of the spinach mixture into the cavity of each artichoke heart.
  5. Place a thin slice of brie on top of the spinach mixture in each artichoke heart.
  6. Broil for a couple of minutes, just until the brie melts and turns slightly golden. Watch carefully to avoid burning.
  7. Transfer to a serving platter and garnish with fresh parsley if desired. Serve warm.

Extra notes: Although it’s the brie that gives the amazing flavor, try replacing it with low fat cheese, mix low fat cheese with brie (50-50) or just use less brie!

Baked Parmesan Zucchini Rounds
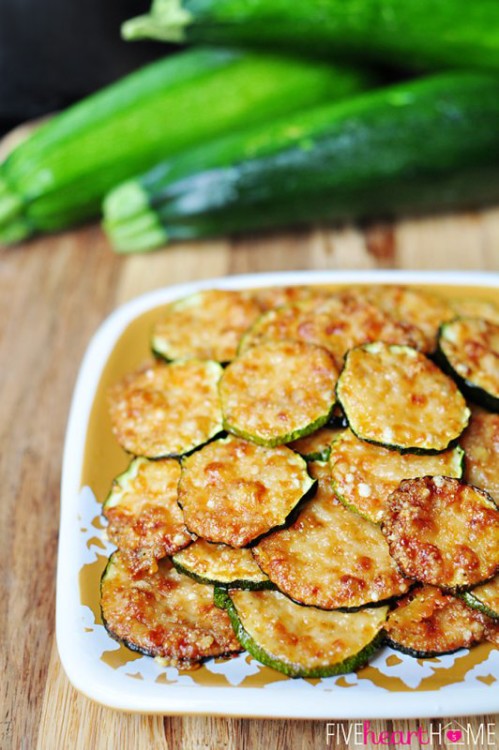
baked parmezan zucchini slices

Since zucchini is a liver-friendly food, cooking it often is a good idea. We’re making it less healthy by adding the extra cheese, but it’s still acceptable over all as a Christmas treat.

Ingredients

  • 2 medium zucchini
  • 1/3 cup freshly grated Parmesan cheese (use sparingly to keep fat low)
  • 1/4 teaspoon garlic powder
  • Freshly ground black pepper and salt, to taste (I usually skip the salt)
  • Fresh parsley or basil, finely chopped (optional garnish for added flavor and presentation). In the photo above, I used rucola leaves which go just as well.

Instructions

  1. Position your oven rack in the center and preheat to 425°F (220°C). Line a baking sheet with parchment paper.
  2. Wash and thoroughly dry the zucchini. Slice them into 1/4-inch thick rounds, aiming for uniform slices to ensure even cooking.
  3. Place the zucchini slices close together on the prepared baking sheet without overlapping. Lightly sprinkle with garlic powder and freshly ground black pepper (and salt if you want to – I usually don’t add it because we have the cheese to handle that).
  4. Use a small spoon to carefully place a thin layer of Parmesan cheese on each zucchini slice. Since we’re keeping the fat content low, add just a small amount.
  5. Bake in the preheated oven for around 15 minutes, or until the Parmesan cheese melts and turns a light golden brown. Watch closely near the end to avoid over-browning.
  6. Serve immediately for the best texture and taste.

My notes: These are extremely easy to make and delicious! They are also great as liver-friendly snacks: just make sure you don’t overdo it if the parmesan cheese on top!

Similar treats can be made using carrot slices or eggplant (aka aubergine) slices, although the latter can get a little soft.

If you want to keep them as healthy as possible, instead of the parmesan cheese, you can add salt, pepper and any of your favorite spices.

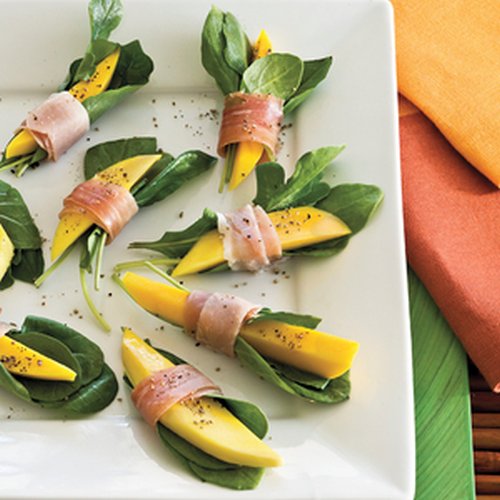
Prosciutto-Wrapped Melon Slices

prosciutto wrapped melon

For something special (at least I wasn’t used to this), wrap some thin slices of melon in prosciutto. Prepare them close to serving time to keep the flavors intact. You can also try this with mango bits and it’s just as good.

Also, unlike the image above, you can try to work out some of the extra fat from the prosciutto to keep it as healthy as possible.

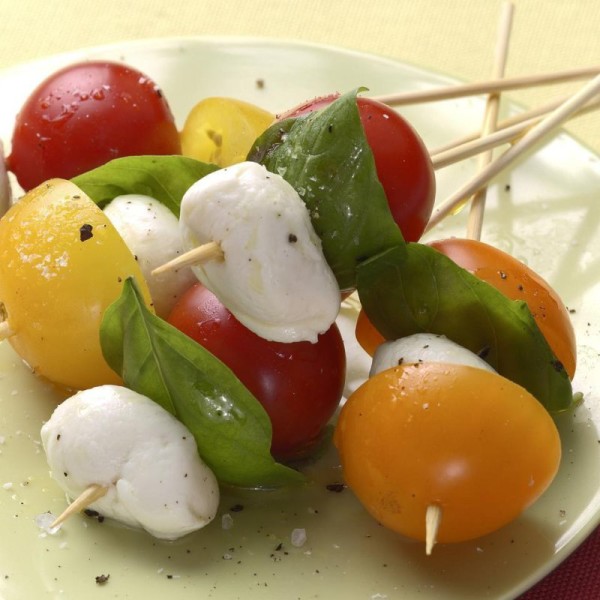
Tomato-Basil Skewers

tomato basil skewers

Above, you can see fresh cherry tomatoes, mozzarella and basil. You can make it even more special by adding extra vegetables like cucumbers or peppers of different colors, Kalamata olives or even some lean roasted chicken / turkey.

Cucumber and Smoked Salmon Bites

Cucumber and Smoked Salmon Bites

Ingredients

  • 1 large cucumber, sliced into rounds
  • 4 oz (115 grams) smoked salmon, cut into small pieces
  • 2 tablespoons Greek yogurt
  • 1 teaspoon fresh dill, chopped (optional)
  • 1/2 teaspoon lemon juice
  • Salt and pepper, to taste

Instructions

  1. In a small bowl, mix the Greek yogurt with lemon juice, a pinch of salt, and pepper.
  2. Place a small dollop of the yogurt mixture on each cucumber slice. Top with a piece of smoked salmon.
  3. Sprinkle with fresh dill if desired. Serve immediately and enjoy!

Optional: If you want to put in a bit more work, but get a more aesthetically-pleasing result, you can create cucumber rolls as seen in the image above. Instead of round slices of cucumber, slice it vertically.

IMPORTANT: Want more recipes and a step-by-step guide to reversing fatty liver disease? If so, everything’s in one place in my new book, From Fatty Liver to Healthy Liver. Click the link to learn more about it and for all buying options!

Christmas soups for fatty liver disease

Eating a soup probably doesn’t sound like Christmas celebrations to you, but you can make them Christmasy enough to work. Plus, they help you fill up faster, so you eat a lot less of the things you’re not supposed to!

Most homemade soups work here, so if you have a favorite that’s low in fat and carbs, pick that! Basically any combination of vegetables (and maybe a bit of lean meat) works. If you need more ideas, here they are:

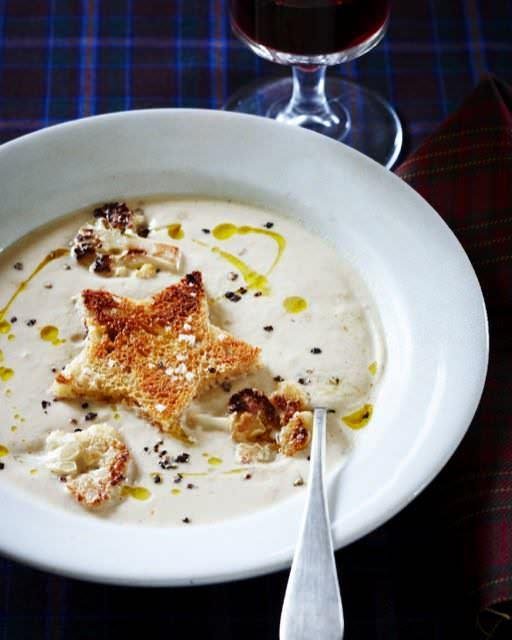
Roasted Cauliflower Soup

Roasted Cauliflower Soup

Ingredients:

  • 2 tablespoons olive oil
  • 1 onion, finely chopped
  • 1 large head cauliflower, broken into pieces
  • 3 cups low-fat, low-sodium chicken stock
  • 1 cup unsweetened almond milk or low-fat, unsweetened coconut milk (If you really can’t do it with the taste, use 1 cup cream but know you’re adding a lot of extra fat, or add 1 cup low fat yogurt without added sugar)
  • salt and pepper to taste

Instructions

  1. Preheat oven to 380F (190C).
  2. Place onion and cauliflower in a large oven proof dish and drizzle with olive oil.
  3. Sprinkle with some salt and pepper.
  4. Roast until golden.
  5. Place the cauliflower and onions in a large pot and add stock.
  6. Bring to a boil and let it boil for 5 minutes, while seasoning with salt and pepper.
  7. Puree in a blender after adding the cup of almond/coconut milk and serve with bits of roasted cauliflower, parsley and drizzle a tiny amount of extra virgin olive oil on top.

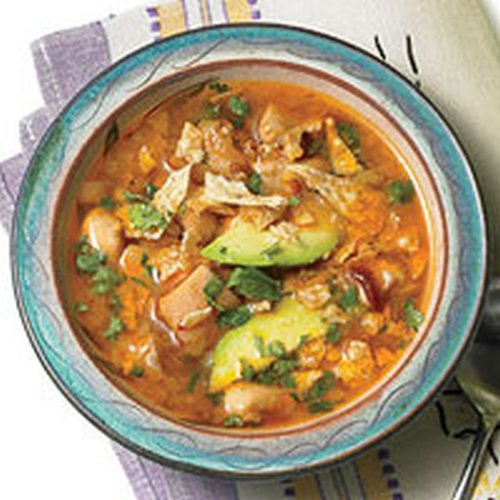
Mexican Chicken Lime Soup

Mexican Chicken Lime Soup

Ingredients (for 4 servings):

  • 1 medium yellow onion, diced
  • 2 ribs celery, diced
  • 1 small jalapeño, seeds removed and diced
  • 3 cloves garlic, minced
  • 1 tablespoon olive oil
  • 1 medium boneless, skinless chicken breast (about 3/4 lb.)
  • 4 cups low-fat, low-sodium chicken broth
  • 1 (10 oz.) can diced tomatoes with green chiles (or use no-salt-added diced tomatoes with a pinch of extra chili powder)
  • 1/2 teaspoon dried oregano
  • 1/2 teaspoon ground cumin
  • 1 lime, juiced
  • 1/4 bunch cilantro, roughly chopped
  • 1 avocado, sliced (optional, for garnish)

Instructions:

  1. In a large soup pot, heat the olive oil over medium heat. Add the diced onion, celery, jalapeño, and minced garlic. Sauté for about 5 minutes, or until the onions are soft and translucent.
  2. Place the chicken breast in the pot and add the chicken broth, diced tomatoes with green chiles (including their juices), oregano, and cumin. Stir to combine.
  3. Cover the pot, turn the heat to high, and bring the mixture to a boil. Once boiling, reduce the heat to low and let the soup simmer for about 45 minutes, allowing the flavors to meld and mixing in from time to time.
  4. After 45 minutes, remove the chicken breast from the pot. Use two forks to shred the meat, then return the shredded chicken to the soup.
  5. Squeeze the juice of one lime into the soup (about 2-3 tablespoons).
  6. Stir in the chopped cilantro just before serving.
  7. Optional: For garnish, slice the avocado and add a few slices to each bowl just before serving. This adds creaminess and healthy fats, while remaining liver-friendly, as avocado is a superfood for the liver.

Butternut Squash and Carrot Creamy Soup
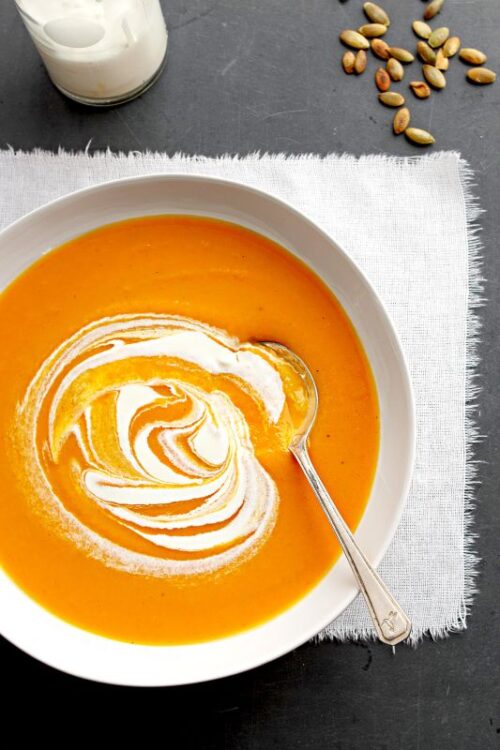
Butternut Squash and Carrot Creamy Soup

Ingredients (for 4 servings):

  • 3 cups butternut squash, peeled and diced (about 1 small squash)
  • 2 cups carrots, thinly sliced (about 4 medium carrots)
  • 1 medium leek or 1 small onion, thinly sliced or chopped
  • 1 teaspoon extra virgin olive oil
  • 4 cups low-fat, low-sodium vegetable or chicken broth
  • 1/4 teaspoon ground white pepper
  • 1/4 teaspoon ground nutmeg
  • 1/2 cup unsweetened almond milk (or low-fat coconut milk for creaminess)
  • Optional Garnishes: Fresh tarragon, toasted pumpkin seeds (pepitas)

Instructions:

  1. In a large saucepan, heat the olive oil over medium heat. Add the diced butternut squash, carrots, and leek (or onion). Cook for about 5-8 minutes, stirring occasionally, until the vegetables start to soften.
  2. Pour in the broth. Bring the mixture to a boil, then reduce the heat to low. Cover and simmer for 25-30 minutes, or until the vegetables are very tender.
  3. Allow the soup to cool slightly. In batches, blend the soup in a blender or use an immersion blender in the pot to purée until smooth.
  4. Return the blended soup to the saucepan. Stir in the white pepper, nutmeg, and almond milk (or low-fat coconut milk) for a creamy texture – although you can completely skip this step. Heat through without bringing it to a boil.
  5. Serve the soup warm. If desired, garnish each bowl with a few toasted pumpkin seeds and a sprig of fresh tarragon.

Christmas Main courses for fatty liver

Now, let’s check out some main courses that are festive enough to pass the approval of all of the family members during the winter holidays. These are my favorite Christmas recipes for fatty liver disease.

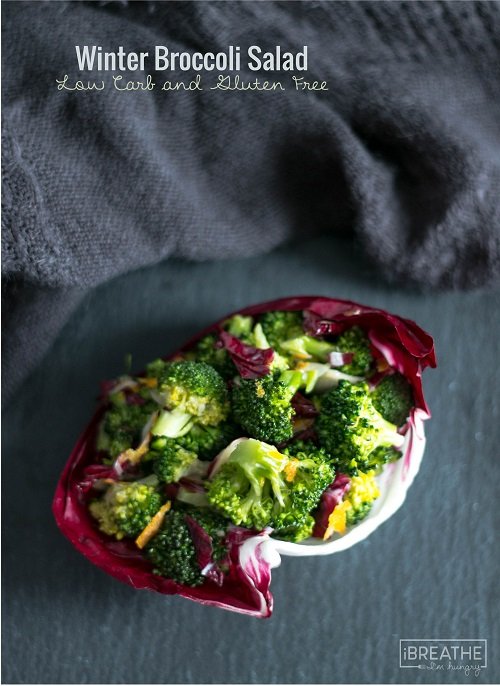
Broccoli and Radish Salad with Gorgonzola
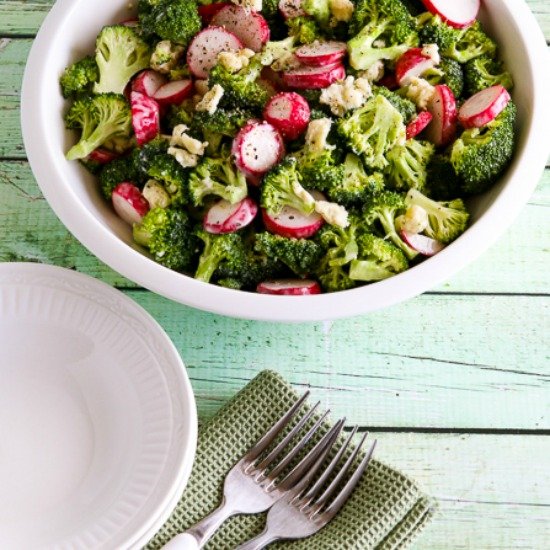
Broccoli and Radish Salad with Gorgonzola

My note: You probably have had your fair share of salads lately, but I have a few more recommendations for you. I am trying to keep things special for this special occasion, as you will see!

Ingredients:

  • 6 cups broccoli, cut into bite-sized pieces
  • 2 cups radishes, sliced about 1/4 inch thick
  • 1/4 cup Greek yogurt
  • 1/4 cup crumbled Gorgonzola cheese
  • Salt and freshly ground black pepper, to taste
  • 1/4 cup morning glory sprouts (optional, for garnish)
  • 2 cloves caramelized garlic (optional)

Instructions

  1. Cut the broccoli into bite-sized pieces. Wash and slice the radishes into 1/4 inch slices.
  2. In a small bowl, mix the Greek yogurt (or even low-fat yogurt without added sugar!) with a pinch of salt and freshly ground black pepper. This will give a creamy base without too much fat.
  3. In a large bowl, combine the broccoli and radishes. Toss with the yogurt dressing to coat evenly.
  4. Add the crumbled Gorgonzola cheese and toss gently. For extra flavor, you can sprinkle morning glory sprouts and caramelized garlic.
  5. Serve immediately. This salad can be kept in the fridge for up to a day, although it’s best fresh.

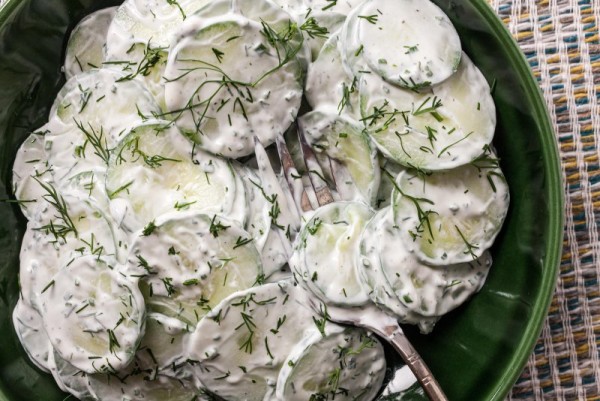
Creamy Cucumber Salad

Creamy Cucumber Salad

I eat this all the time, but most people don’t. It’s basically a Greek tzatziki with larger cucumber bits. Healthy, satisfying and delicious!

Ingredients

  • 2 English cucumbers, thinly sliced (although regular cucumbers work well too)
  • 4 cloves garlic, minced

For the Dressing:

  • 1/2 cup plain Greek yogurt or even regular yogurt
  • 1/4 cup fresh dill, chopped
  • 2 tablespoons apple cider vinegar
  • Salt and pepper, to taste

Instructions:

  1. In a large bowl, whisk together the Greek yogurt, dill, vinegar, and a pinch of salt. Adjust seasoning to taste, adding a bit more ACV if you prefer extra tang.
  2. Add the cucumber slices and minced garlic to the bowl with the dressing. Gently toss until the cucumbers and onions are evenly coated.
  3. Refrigerate for about 1 hour to let the flavors meld.

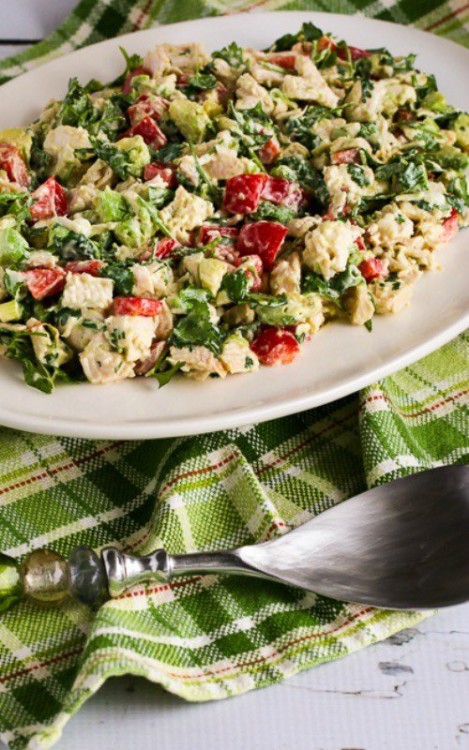
Chicken Christmas Salad

chicken Christmas salad

Ingredients

  • 4 cups cooked, diced chicken breast (poached or baked, to keep fats low)
  • 1 large red bell pepper, chopped
  • 1/2 cup sliced green onion
  • 1/2 cup chopped fresh cilantro (double green onion quantity if not using)
  • 1 large avocado, diced
  • 2 tablespoons fresh-squeezed lime juice (to toss with the avocado and for dressing)
  • 1/2 cup crumbled Feta cheese (use sparingly for flavor)

For the Dressing:

  • 2 tablespoons plain Greek yogurt (you can use low-fat yogurt without added sugar, too)
  • 1 tablespoon extra virgin olive oil
  • 1 tablespoon fresh-squeezed lime juice
  • 1 tablespoon each of fresh dill and parsley, chopped
  • Salt, to taste (use sparingly)

Instructions

  1. Poach or bake 3-4 chicken breasts and dice them into bite-sized pieces. Set aside.
  2. Dice the red bell pepper and avocado. Toss the avocado with 1 tablespoon of lime juice to prevent browning. Slice the green onions and chop the cilantro if using.
  3. In a small bowl, whisk together the Greek yogurt, EVOO, 1 tablespoon lime juice, dill and parsley, and a small pinch of salt. Taste and adjust the seasoning as needed.
  4. In a large bowl, toss together the chicken, red bell pepper, and green onion/cilantro with the dressing until well-coated.
  5. Gently fold in the avocado, and crumbled Feta cheese. Mix lightly to keep the avocado and Feta from breaking apart (or if you want them creamier, work your magic!)
  6. Serve immediately or chill for an hour to let the flavors meld.

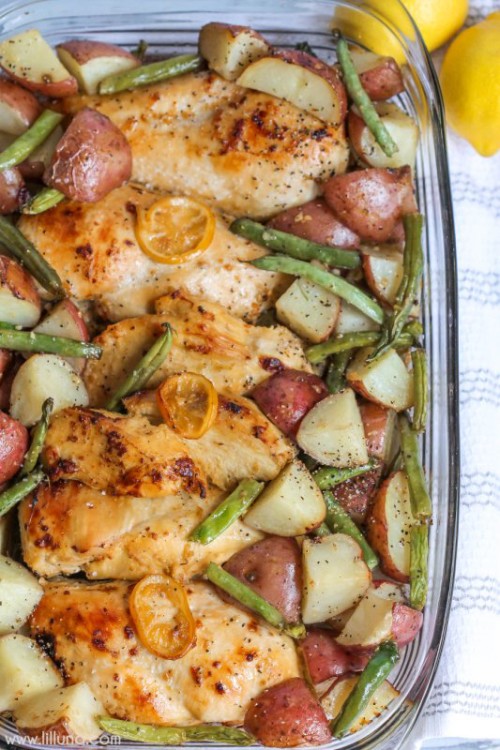
Lemon Chicken with Veggies

Lemon Chicken with Veggies

Ingredients

  • 4 boneless, skinless chicken breasts
  • 3 tablespoons extra virgin olive oil
  • 2 lemons (1 thinly sliced, 1 juiced)
  • 4 cloves garlic, minced
  • 1/2 teaspoon kosher salt (use sparingly)
  • 1/4 teaspoon freshly ground black pepper
  • 3/4 lb green beans, trimmed
  • 6 small red potatoes, quartered
  • 1 small red onion, chopped
  • 2 medium carrots

Instructions

  1. Preheat the oven to 350°F (175°C). Coat a large baking dish with 1 tablespoon of olive oil. Arrange the lemon slices in a single layer on the bottom of the dish.
  2. In a large bowl, combine the remaining 2 tablespoons of olive oil, lemon juice, minced garlic, salt, and pepper.
  3. Coat the Vegetables and Chicken:
    • Start by adding the green beans to the bowl with the oil mixture. Toss to coat, then place them on top of the lemon slices in the baking dish.
    • Next, add the potatoes, onions, and carrots to the bowl and toss to coat. Arrange these veggies around the edges of the dish, over and around the green beans.
    • Finally, coat the chicken breasts in the remaining oil mixture, then place them in the center of the baking dish.
  4. Cover the dish with foil and bake in the preheated oven for about 1 hour, or until the potatoes are tender, and the chicken is fully cooked through. To get a beautiful golden top, remove the foil during the last 15 minutes of baking.
  5. Serve warm, garnished with any remaining fresh lemon slices or extra herbs like rosemary, cilantro, parsley or anything you fancy.

Just make sure you don’t eat too many of those delicious potatoes, although they’re not as bad as you might think they are.

Baked Salmon with Asparagus and Quinoa

Baked Salmon with Asparagus and Quinoa

Ingredients (4 servings)

  • 4 salmon fillets (about 4 oz each)
  • 1 lemon, sliced into rounds
  • 1 tablespoon fresh parsley, chopped
  • 1 tablespoon fresh dill, chopped (optional)
  • 1 tablespoon olive oil
  • Salt and black pepper, to taste
  • 1 bunch asparagus, trimmed
  • 1 cup quinoa, rinsed
  • 2 cups low-sodium vegetable or chicken broth (or water for cooking quinoa)

Instructions

  1. Preheat your oven to 400°F (200°C). Line a baking sheet with parchment paper.
  2. Place the salmon fillets on the baking sheet. Arrange lemon slices on top of each fillet and sprinkle with fresh parsley, dill (if using), salt, and pepper. Place the trimmed asparagus spears around the salmon. Drizzle the olive oil over the salmon and asparagus.
  3. Bake in the preheated oven for around 20 minutes, or until the salmon is cooked through and flakes easily with a fork, and the asparagus is tender.
  4. While the salmon is baking, prepare the quinoa. In a medium saucepan, bring the vegetable or chicken broth to a boil. Add the rinsed quinoa, reduce the heat to low, cover, and simmer for about 15 minutes, or until the quinoa has absorbed all the liquid. Fluff with a fork and set aside.
  5. Plate each salmon fillet with a portion of asparagus and quinoa. Garnish with extra fresh herbs, cherry tomato bits and a lemon wedge if desired.

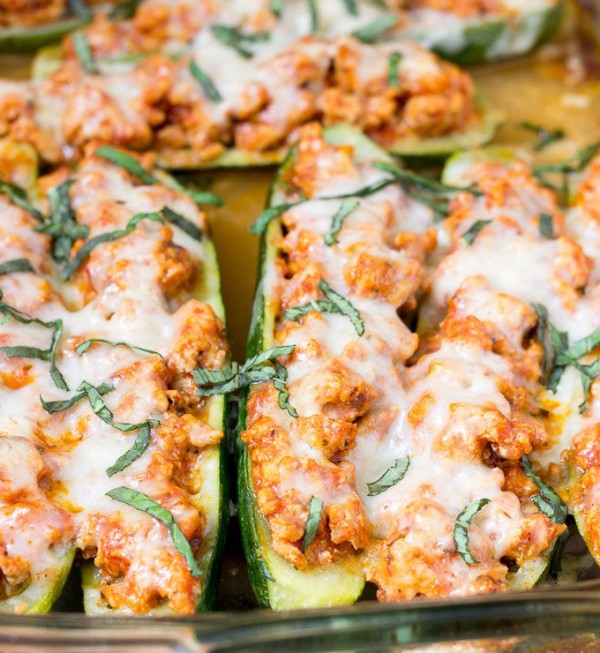
Chicken Parmesan Zucchini Boats

Chicken Parmesan Zucchini Boats

Ingredients

  • 4 medium zucchini
  • 1 lb. (450 grams) ground chicken (or use ground turkey as an alternative)
  • 1/4 teaspoon salt
  • 1/4 teaspoon ground black pepper
  • 2 garlic cloves, minced
  • 1 cup no-sugar-added pasta sauce (or better, use 100% tomato puree instead)
  • 2 tablespoons grated Parmesan cheese
  • 1/4 cup shredded part-skim mozzarella cheese
  • Optional: fresh basil, thinly sliced, to garnish

Instructions

  1. Preheat the oven to 400°F (200°C). Place a baking sheet on your baking tray.
  2. In a large non-stick skillet over medium-high heat, add the ground chicken. Break it apart with a spoon, and season with salt and pepper. Cook for 8-10 minutes, stirring occasionally, until fully cooked through. If needed, add a bit of water when cooking.
  3. Reduce heat to low. Add minced garlic to the chicken and cook for 1 minute, stirring frequently. Pour in the no-sugar pasta sauce (or tomato puree) and cook for another 3 minutes, stirring occasionally to combine.
  4. While the chicken cooks (during step #2), cut each zucchini in half lengthwise. Using a spoon, scoop out the seeds and inner flesh, creating a “boat” shape with about 1/4-inch thickness remaining.
  5. Optional: add the scooped-up zucchini to the chicken, while it is cooking.
  6. Arrange the zucchini halves, cut-side up, in the prepared baking dish. Spoon the chicken mixture into each zucchini boat, pressing the filling down with the back of a spoon.
  7. Sprinkle each zucchini boat with Parmesan and the shredded Mozzarella.
  8. Cover the baking dish with foil and bake for 30-35 minutes, or until the zucchini is tender. I like it crispier – if you do too, remove the foil in the final 5-7 minutes of cooking.
  9. Remove from the oven and sprinkle with fresh basil, if desired. Serve warm and enjoy!

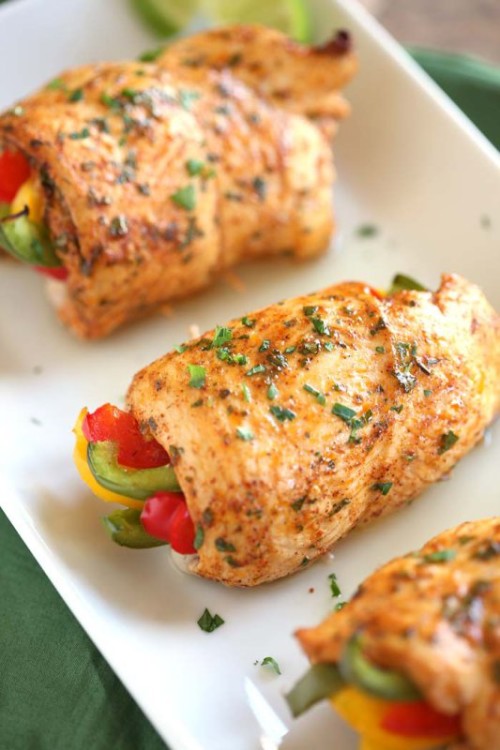
Baked Chicken Fajita Rolls

Baked Chicken Fajita Roll-Ups

Ingredients

For the Marinade:

  • 2 tablespoons extra virgin olive oil
  • Juice of half a lime
  • 1 clove garlic, minced
  • 1 teaspoon chili powder
  • 1/2 teaspoon ground cumin
  • 1/2 teaspoon dried oregano
  • 1/4 teaspoon salt
  • Pinch of cayenne pepper (optional, if you like it spicier)
  • 2 tablespoons fresh cilantro, chopped

For the Chicken:

  • 3 chicken breasts, sliced horizontally to make thinner cutlets, or 6 thin sliced chicken cutlets (about 1/4-inch thick)
  • 1/2 red bell pepper, sliced into thin rounds
  • 1/2 yellow bell pepper, sliced into thin rounds
  • 1/2 green bell pepper, sliced into thin rounds
  • 6 medium-sized tomatoes, sliced into rounds

Instructions

  1. In a small bowl, whisk together all the ingredients for the marinade and set aside.
  2. If you have full chicken breasts, slice them horizontally to create thinner cutlets (around 1/4-inch thick). Use the smooth side of a meat tenderizer to pound each cutlet to an even thickness, if needed.
  3. Place the chicken cutlets in a large resealable freezer bag or a shallow dish. Pour the marinade over the chicken, ensuring all pieces are fully coated. Marinate in the refrigerator for at least 1 hour, or ideally overnight for more flavor.
  4. Assemble the Roll-Ups:
    • Lay each chicken cutlet flat on a clean surface.
    • Arrange a few bell pepper slices along the top of each chicken cutlet and roll them (use a toothpick to keep them in place).
    • Place slices of tomato on top of the chicken.
  5. Preheat the oven to 375°F (190°C). Place the assembled chicken cutlets in a baking dish, with the tomato slices facing up.
  6. Bake, uncovered, in the preheated oven for 25-30 minutes, or until the chicken is cooked through and the juices run clear.
  7. Carefully remove any toothpicks if used, and garnish with a sprinkle of fresh cilantro if desired. Serve warm and enjoy!

Stuffed Squash with Quinoa & Vegetables

Stuffed Squash with Quinoa Vegetables

Ingredients

  • 2 medium butternut squash, cut in halves and with seeds removed
  • 2 teaspoons extra virgin olive oil
  • 3/4 cup quinoa
  • 1 1/2 cups low-sodium vegetable or chicken broth
  • 1 bunch kale, stems removed and chopped (about 6 lightly packed cups)
  • 1 red bell pepper, diced
  • 2 cloves garlic, minced
  • 1 teaspoon dried oregano
  • 1/2 teaspoon kosher salt (plus extra for roasting the squash)
  • 1/2 teaspoon black pepper (plus extra for roasting the squash)
  • Zest of 1 orange plus 1 tablespoon fresh orange juice
  • 1/4 cup chopped walnuts, for topping
  • Grated Parmesan cheese or crumbled feta cheese (optional, for garnish)
  • some fresh, chopped Basil, also for garnish.

Instructions

  1. Preheat the oven to 425°F (220°C) and place a rack in the center. Place the butternut squash halves, cut-side up on a baking tray. Drizzle with 1 teaspoon of olive oil and sprinkle lightly with salt and pepper. Roast for around 50 minutes, or until fork-tender. Remove from the oven and allow to cool. Reduce the oven temperature to 375°F (190°C).
  2. While the squash is roasting, bring the broth to a boil in a small saucepan. Add the quinoa, return to a boil, then reduce heat to low. Cover and let simmer for about 12 minutes, or until most of the broth is absorbed. Remove from heat and let sit, covered, for 5 minutes. Fluff with a fork and set aside.
  3. In a large skillet, heat the remaining 1 teaspoon of olive oil over medium heat. Add the chopped kale and diced red bell pepper. Sauté until the kale is wilted and the peppers are tender, about 4-5 minutes. Reduce the heat to medium-low and add the garlic, oregano, 1/2 teaspoon salt, and 1/2 teaspoon black pepper. Cook for an additional minute to let flavors mix well.
  4. Stir in the orange zest, orange juice, and cooked quinoa into the kale and pepper mixture. Mix well to combine all flavors.
  5. Once the roasted squash is cool enough to handle, scoop out some of the flesh, leaving a 1/2-inch-thick border around the sides and a 3/4-inch border along the bottom (save the extra squash flesh for another use or mix with the quinoa). Spoon the quinoa and kale filling into each squash half, pressing it down lightly to pack.
  6. Return the stuffed squash halves to the oven and bake at 375°F for about 10 minutes, until heated through.
  7. Remove from the oven, sprinkle with chopped walnuts for added crunch, and garnish with a light sprinkle of Parmesan or feta cheese if desired. Serve warm.

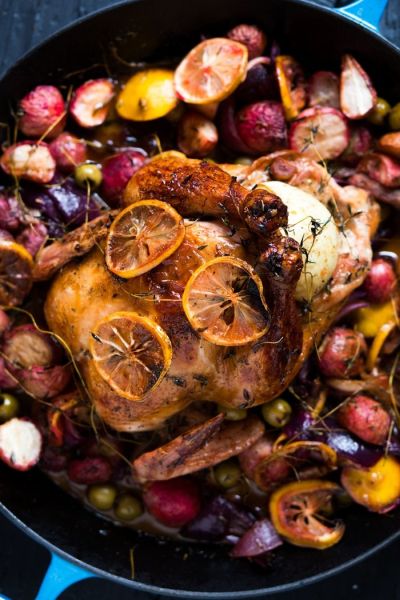
Juicy Lemon Roast Chicken

Juicy Lemon Roast Chicken

Ingredients

  • 1 whole chicken (5 to 6 pounds), skin removed for lower fat, if preferred
  • Kosher salt and freshly ground black pepper
  • 1 medium onion, quartered
  • 20 sprigs fresh thyme (or substitute with rosemary for variety)
  • 1 tablespoon extra-virgin olive oil
  • 8-10 cloves garlic, thinly sliced lengthwise
  • 4 medium red onions
  • 2 bunches medium radishes, trimmed and halved
  • 1 lemon, thinly sliced crosswise
  • 2/3 cup low-fat, low-sodium chicken broth
  • 2 teaspoons balsamic vinegar

Instructions

  1. Preheat your oven to 425°F (220°C).
  2. Rinse the chicken inside and out and pat dry with paper towels. If desired, remove the skin for a lower-fat option (it will be less tasty overall, though). Season the cavity of the chicken with a generous amount of salt and freshly ground black pepper. Stuff the cavity with the quartered onion, a few sprigs of thyme, and a few garlic slices. Tie the legs together with kitchen string.
  3. In a roasting pan, pour 1 tablespoon of olive oil and spread it around. Arrange the remaining garlic, red onions, radishes, and lemon slices around the bottom of the pan. Scatter the remaining thyme sprigs over the vegetables.
  4. In a small bowl, mix together the chicken broth and balsamic vinegar. This will add depth and slight sweetness to the dish without using added sugars (although it’s still some extra carbs!). Pour the mixture over the chicken and vegetables in the roasting pan.
  5. Liberally season the outside of the chicken with salt and freshly ground black pepper. Place the prepared chicken on top of the vegetables in the roasting pan.
  6. Roast in the preheated oven for 1 1/2 hours, or until the juices between the leg and thigh run clear.
  7. Cover the chicken with aluminum foil and let it rest for about 20 minutes before carving. This resting time helps retain the juices.

Christmas Desserts for NAFLD

Unfortunately, we do have to keep the sweets intake as low as possible, which means that most of the things we used to eat during this time of the year should be avoided.

However, I do have some desserts that are safer than most of the other options out there.

Don’t forget though: eat just a little, as a treat and don’t consider any of these desserts things you could consume on a daily basis or in large quantities! Consider them a treat for the holidays and enjoy!

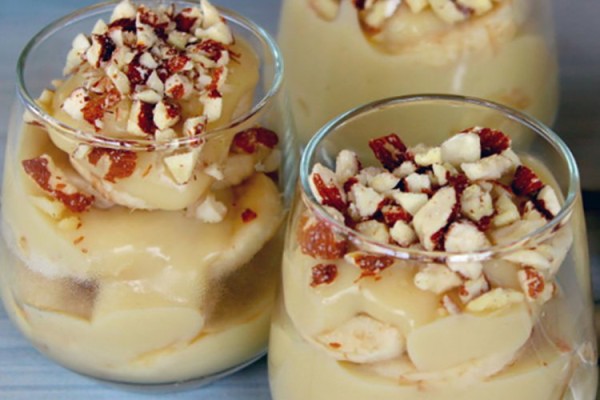
Banana Pudding

banana pudding

Ingredients

  • 10 roasted almonds (or use roasted hazelnuts instead)
  • 2 tablespoons cornstarch
  • Dash of sea salt
  • 1 tablespoon pure maple syrup (optional for sweetness, can adjust to taste or not add at all, especially as the bananas will be sweet)
  • 1 egg yolk, slightly beaten
  • 3/4 cup unsweetened almond milk (or canned lite coconut milk for a creamy texture)
  • 1/2 teaspoon pure vanilla extract
  • 2 ripe bananas, (one thinly sliced, one whole)

Instructions

  1. In a medium saucepan, combine the cornstarch, salt, and maple syrup (if using) until well mixed. Add the egg yolk and stir to combine.
  2. Gradually whisk in the almond milk until the mixture is smooth. Place the saucepan over medium heat and cook, stirring constantly, until the mixture thickens to a pudding-like consistency (about 5-7 minutes).
  3. Remove the saucepan from the heat and stir in the vanilla extract and the whole banana, mashed.
  4. While the pudding is still warm, layer the pudding and remaining banana slices in dessert dishes or glasses. Alternate layers of pudding and banana slices until each dish is filled. (Optionally: you can mash the second banana too and mix it into the pudding).
  5. Sprinkle the roasted almonds (or hazelnuts) on top of each pudding. Enjoy chilled.

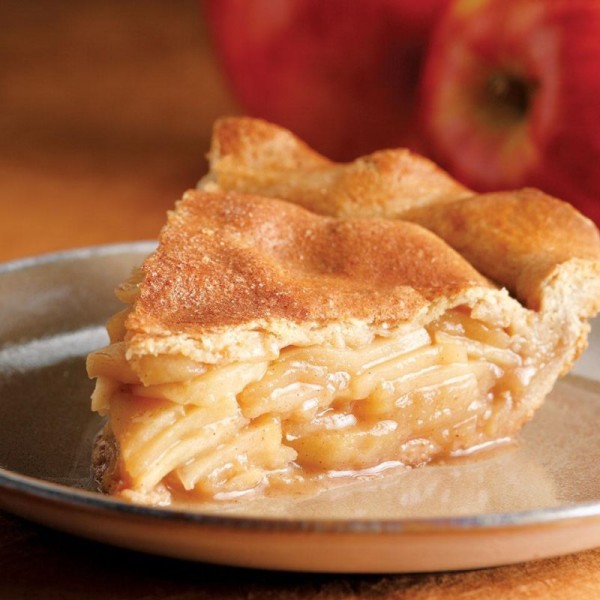
Liver-Friendly Double Apple & Oat Crumble Pie

Crust Ingredients

  • 3/4 cup whole-wheat pastry flour
  • 3/4 cup almond flour
  • 1 tablespoon ground flaxseed (for added fiber and omega-3s)
  • 2 tablespoons Erythritol (use Stevia if you’re not happy about erythritol, or even coconut sugar as a last resort)
  • 1/4 teaspoon salt
  • 3 tablespoons cold unsalted butter, cut into small pieces
  • 1/4 cup Greek yogurt
  • 2 tablespoons coconut oil, melted and cooled
  • 3-4 tablespoons ice water

Filling Ingredients

  • 3 cups thinly sliced peeled McIntosh apples (about 1 pound)
  • 3 cups thinly sliced peeled Granny Smith apples (about 1 pound)
  • 1/4 cup pure maple syrup
  • 1 tablespoon lemon juice
  • 1 1/4 teaspoons ground cinnamon, divided
  • 1/8 teaspoon ground nutmeg
  • Pinch of ground ginger
  • 1 tablespoon ground chia seeds
  • 1/4 teaspoon salt

Oat Crumble Topping (Optional)

  • 1/3 cup rolled oats
  • 2 tablespoons almond flour
  • 1 tablespoon coconut oil, melted
  • 1 tablespoon coconut sugar
  • 1/4 teaspoon cinnamon

Instructions

Prepare the Crust:

  1. In a large bowl, whisk together the whole-wheat pastry flour, almond flour, ground flaxseed, erythritol/coconut sugar, and salt.
  2. Add the cold butter pieces to the bowl and use your fingers to rub them into the flour mixture until they’re about pea-sized.
  3. Stir in the Greek yogurt and coconut oil with a fork, mixing just until combined.
  4. Sprinkle ice water over the mixture, 1 tablespoon at a time, tossing with a fork until the dough is evenly moist and begins to hold together. Knead the dough a few times with your hands to bring it together, then form it into a 5-inch disk. Wrap in plastic wrap and refrigerate for at least 1 hour.

Make the Filling:

  1. In a large bowl, toss the sliced apples with maple syrup, lemon juice, 1 teaspoon cinnamon, nutmeg, ground ginger, and salt. Stir in the ground chia seeds (this will help thicken the filling).
  2. Transfer half of the apple mixture to a large saucepan and cook over medium heat, stirring occasionally, until the apples are tender and slightly softened, about 10 minutes. Remove from heat and let cool. Stir in the uncooked apples and let cool completely.

Assemble & Bake the Pie:

  1. Position a rack in the lower third of the oven and preheat to 400°F (200°C).
  2. Remove the dough from the refrigerator and let it rest for 5 minutes. Roll it out on a lightly floured surface or between sheets of parchment paper into a 13-inch circle. Gently transfer the dough to a 9-inch pie pan, pressing it into the sides and trimming any excess.
  3. Spoon the apple filling into the prepared crust, spreading it evenly.
  4. Optional crust: In a small bowl, mix together the oats, almond flour, melted coconut oil, coconut sugar, and cinnamon. Sprinkle this mixture evenly over the apples for a crunchy, nutty topping.

Bake the Pie:

  1. Bake the pie on the lower rack for 15 minutes, then reduce the oven temperature to 350°F (175°C) and continue baking for another 25-35 minutes, until the crust is golden brown and the filling is bubbly. If the crust starts to brown too quickly, cover the edges with foil.
  2. Let the pie cool on a wire rack for at least 1 hour to set. Serve at room temperature (but you can also store it in the refrigerator and consume later).

My notes: This recipe is based on the original at Eatingwell.

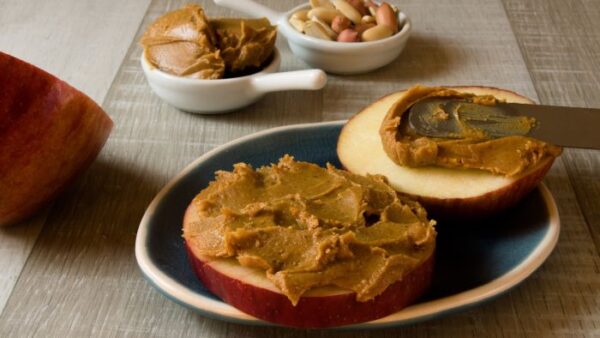
Peanut butter apple slices

apple and peanut butter

This extremely simple dessert (or snack) has also become a favorite of my son’s. Simply slice an apple, add a bit of peanut butter (made 100% from peanuts) and enjoy!

Alternatively, you can add in banana with peanut butter or mix the two for different textures and tastes. Both should be eaten immediately after preparing, though.

Fruit salad

winter fruit salad

Just go wild and use your favorite fruits here – cut them into bit-sized bits and mix them well together.

Store in the fridge and eat them as soon as possible to avoid oxidation. Oh, yes – and don’t add any sugar or syrup or anything!

No-bake coconut balls

coconut balls

Ingredients

  • 1/2 cup raw almonds (plus 10-12 pieces roasted almonds)
  • 2/3 cup pitted Medjool dates (about 12 dates)
  • 1 tablespoon unsweetened cocoa powder
  • 2 tablespoons coconut flakes
  • 1 teaspoon vanilla extract
  • 1 tablespoon coconut oil
  • 1/4 cup unsweetened shredded coconut flakes, for rolling

Instructions

  1. Place the raw almonds in a food processor and pulse until finely chopped.
  2. Add the pitted dates to the food processor and blend until the mixture begins to stick together.
  3. Add the cocoa powder, coconut flakes (2 tablespoons), vanilla extract, and coconut oil. Blend until the ingredients begin to combine into a sticky dough. If the mixture is too dry, add a few drops of water or coconut milk (without sugar).
  4. Form the Balls:
    • Scoop out a heaping teaspoon of the mixture and place a whole roasted almond in the center.
    • Press the mixture around the almond and gently form it into a ball.
  5. While each bite is still warm and slightly sticky, roll it in the shredded coconut flakes to coat the outside.
  6. Place the finished bites on a plate or baking sheet and refrigerate for about 30 minutes to allow the coconut oil to firm up, helping the bites hold their shape.
  7. You can enjoy them after 30 minutes or store in an airtight container in the refrigerator for up to one week.

A fatty liver Christmas: tell this to your family!

One thing that I usually do around this time of the year is to have a serious talk with my family and explain that my fatty liver is a special condition that requires special foods.

Even though I have reversed mine, I still eat as if I still have it and so should you. This is difficult – especially for those that have no restrictions in place – but it has to be done.

So, during this time of the year, I make sure to ask for them to be supportive – and that’s something I recommend you do as well.

I am lucky enough to have a great wife who eats exactly what I eat during Christmas (and the rest of the year mostly), but also a young child who enjoys his sweets and needs more variety in his diet.

They are allowed – and actually encouraged – to eat things that I am not allowed to when they go out, when I’m not around or while hiding in the kitchen or somewhere (yes, that happens too!).

If your family isn’t as on board after talking to them just remember that you’re doing this for your health. It will be more difficult, but it has to be done because it’s your health and well being that we’re talking about!


Don’t forget to share, pin and save this article – it will surely be useful to you in the future and helps more people find it too! Let’s help all those with liver problems have a merry Christmas!

Fatty Liver christmas Menu Pin

Also, if you want more food ideas, you can check my previous articles sharing breakfast ideas for fatty liver, liver-friendly lunch ideas or dinner ideas for those who were diagnosed with a fatty liver.
Do you have other suggestions for liver-friendly Christmas dishes? Share them with us all below: the more options we have, the better!

If you find this website useful and you want to help keep it alive, you can join my Patreon. Thank you!

Leave a Comment